Category: Uncategorized

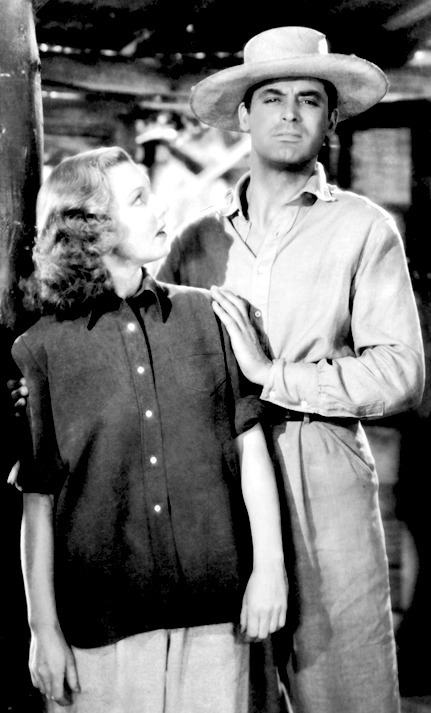
Ireland, 1940
Hello Lauri, I’m researching Moira Shearer. Do you recall where you found the image of her with the veil and guipure lace? Thanks Dai
Hi! It’s a screencap from The Red Shoes, it’s the scene at the train station and you can find that particular shoot at around 43:34 as you can see here:

(the quality is awful here because I moved my hd version to my external drive and I’m not at home at the moment, if you need an hd cap let me know and I can get you one tomorrow evening or on Tuesday 🙂 )
misssusanvance replied to your photoset :
Asoiaf Old Hollywood fancast ↝ Greer Garson as…
How do you do that script that writes across the gif? I’ve started making photo sets and would like to use that feature. Thanks!!
Ok, so, there are probably simpler ways to do this, but here goes.
The animation is all done in Photoshop (while programs like say After Effects would be more suited, but in ps it’s quicker for me to do it) and basically it’s simply a moving mask. You start by designing the text the way you want it (I personally do this in Illustrator but it’s only because I have more experience with that and it takes me way less time, but doing it directly in ps is exactly the same). Make sure it’s on a transparent background. Rasterize the text (right click on level->rasterize type). Open the animation/timeline window (under the “window” menu). It should appear in the bottom of the page. Click on “create frame animation”. Then with the marquee tool (shortcut “m”), draw a rectangle around your text, leaving a bit of margin. Now with your text level selected add a layer mask (if you’re not familiar with photoshop, it’s here:

Now you want to click on the little chain that links the layer to the mask. Then go back to the animation panel and duplicate the frame twice, by clicking on

(Note that I’ve changed the loop to “Forever”, now is as good a time as any to do it, you’ll have to eventually).
Basically what I’m doing now is moving the mask so that the text appears in three phases: no text visible – 50% text visible – all text visible. That’s why I have three frames. So, click on the mask (NOT the layer image, the mask, sometimes I forget to do that and it’s annoying as fuck)

Go on the first frame and slide the text to the left with the move tool (v). (Make sure your canvas is big so the mask doesn’t exit it, trust me, it’s going to be a mess if it does) What you’re actually doing is sliding the mask. Slide until the text is not visible at all.
Now go on the second frame and slide until half your text is visible:

Then on to the third frame, slide until you can see everything.

Ta-da! Now that you have your three main stages so to speak, you want to create stuff in between. Select BOTH the first and second frame (NOT the third) and click on tween:

This creates the transition frames between the two you selected. You can play around with it, if you put more frames it’s going to be a slower transition, if you put less it’s quicker, in this particular case I have 5.
Click ok and do exactly the same thing, only this time instead of selecting the first two frames you select the last two. The animation is done 😀 If you want to extend the first or last frame so that the text stays on a bit longer you simply copy them however many times you want. If you’re exporting the text onto a gif however you have to have the same exact number of frames on both files. So if you gif is 30 frames long copy the last or first frame until you get to 30. Then you need to export it onto the gif or the image. Select all your frames, click on the menu in the animation panel and select “copy frames”

Now go to the git/image you want the script to be on. Select all of its frames, then menu and paste frames. Select “paste over selection” in the popup.

(Oh, I forgot, before you copy the frames it’s better to make sure both canvases are the same dimensions, otherwise you’re going to have to move the text to get it where you want it )
And that’s it 😀 That’s the result, now you just need to fight with the saving settings so the gif is small enough to go on tumblr (sigh, goodbye colours, goodbye sharpness).

It’s a lot easier to do if you have a bit of experience working with gifs on photoshop, I wouldn’t start off with this from scratch. Also, I use the sliding script thing because I’m doing old Hollywood themed stuff, and it was a common feature in trailers back then, so it might look a bit weird with modern or period stuff.

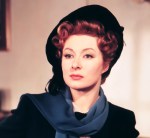

Asoiaf Old Hollywood fancast
↝ Greer Garson as Catelyn Tully
“One day she would allow herself to be less than strong. But not today. It could not be today.”


no but really, like
i know that some folks love telling creative people that “you should be doing it for fun because you love it not for the compliments” but creative people thrive on feedback whether it’s critical or just complimentary
so when i write fanfiction and don’t get any actual feedback i feel like i spent all that time and energy doing it for nothing because i’m not getting feedback from the people i wrote it for
doing something you’re proud of and then presenting it to the sound of utter silence is like the worst feeling on earth